How to Embroider onto Knitting: A Comprehensive Guide
If you’re wondering how to embroider onto knitting, look no further. At Veneziabeachv.vn, we’re here to guide you through the process, step by step. Embroidering onto knitting adds a unique touch to your projects and allows you to express your creativity. In this comprehensive guide, we’ll cover everything from understanding the basics of embroidery to mastering essential stitches and techniques. Get ready to unleash your imagination and elevate your knitting with the art of embroidering onto knitting.

| Key Takeaways |
|---|
| – Understanding the basics of embroidering onto knitting |
| – Preparing your knitting for embroidery |
| – Essential embroidery stitches for knitting |
| – Step-by-step guide for embroidery onto knitting |
| – Tips and tricks for successful embroidery |
| – Inspiring ideas and examples of embroidered knitting projects |
I. Choosing the Right Knitting Project
Embroidering onto knitting allows you to add beautiful and intricate designs to your projects. However, not all knitting projects are suitable for embroidery. It’s important to choose the right project that will provide a suitable canvas for your embroidery. Here are a few factors to consider:
1. Type of Knitting
The type of knitting project you choose plays a crucial role in the success of your embroidery. Projects with a tight stitch pattern, such as stockinette or garter stitch, provide a smooth surface for detailed embroidery work. Avoid highly textured or lacy knits, as they can make it challenging to maintain the integrity of your embroidered design.
2. Size and Shape
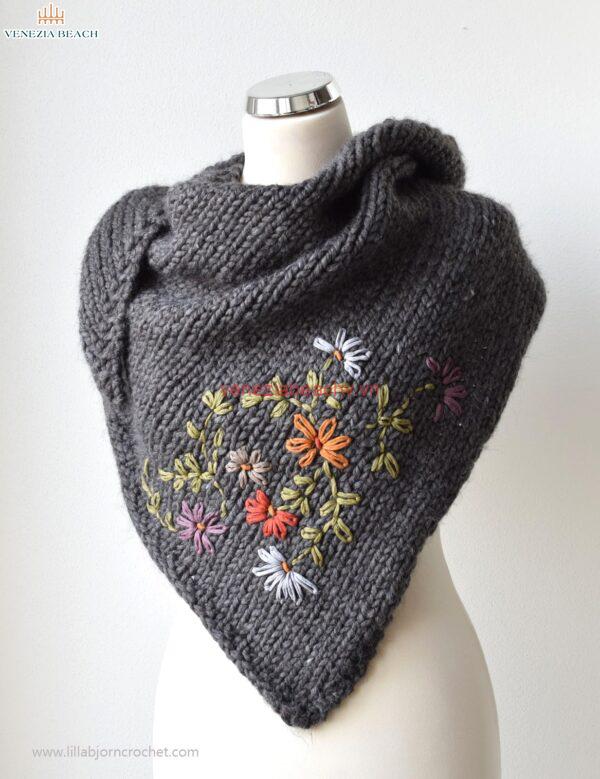
Consider the size and shape of your knitting project. Larger projects, such as sweaters or shawls, offer more surface area to showcase elaborate embroidery designs. Smaller projects, like hats or mittens, are ideal for simpler and more compact embroidery motifs.
3. Yarn Fiber and Color
Take into account the fiber and color of the yarn you’re using. Smooth yarns in solid or semi-solid colors provide a clean backdrop for embroidery, allowing the stitches to stand out. Avoid highly variegated or textured yarns that may distract from the embroidered details.
By carefully selecting the right knitting project, you’ll set yourself up for embroidery success and create a stunning finished piece.

II. Preparing Your Knitting for Embroidery
Choosing the Right Knitting Project
Before you start embroidering onto your knitting, it’s important to choose the right project. Consider the size and complexity of the knitting pattern, as well as the type of yarn you’ll be using. Opt for simpler designs and lighter weight yarns for your first embroidery ventures. This will make the stitching process easier and allow the embroidery to stand out. Choose a knitting project that has a smooth surface, without too much texture, as this will provide a better canvas for your embroidery stitches.
| Related Posts: | |
|---|---|
| How to Catch a Predator Shirt | How to Add Words to E-Sword Dictionary |
Blocking and Finishing Your Knitting
Before you begin embroidering, it’s essential to block and finish your knitting. Blocking involves soaking your knitting project in water and shaping it to the desired dimensions. This step evens out the stitches and relaxes the fibers, allowing for more accurate embroidery placement. Once your project is dry, you can also add any desired finishing touches, such as weaving in loose ends or sewing on buttons. Finishing your knitting ensures that it looks polished and professional, providing a solid foundation for your embroidery.
| Related Posts: | |
|---|---|
| How to Build a Scalping Strategy Using Adaptrade | How to Get Free Credits on Smartjailmail |
Selecting a Design or Pattern
Once your knitting is ready, it’s time to select a design or pattern for your embroidery. Consider the overall aesthetic of your knitting project and choose a design that complements it. You can opt for simple motifs, intricate patterns, or even create your own custom design. Look for embroidery patterns specifically designed for knitting, as they take into account the unique characteristics of knitted fabric. Keep in mind that the size of the embroidery should be proportionate to the knitting project to ensure a balanced and harmonious look.
| Related Posts: | |
|---|---|
| How to Get My Husband on My Side Chapter 71 | How to Annoy a Jealous Person |
Transferring the Design onto Your Knitting
Once you have a design in mind, the next step is to transfer it onto your knitting. One popular method is using a lightbox and tracing the design directly onto the knitting with a fabric pen or washable marker. Another option is to print the design on paper, secure it to your knitting with stitch markers or pins, and carefully trace the design onto the fabric. Alternatively, you can use an embroidery transfer pencil to transfer the design by tracing over it with pressure, leaving behind a faint outline. Choose the method that works best for you and your knitting project.
| Related Posts: | |
|---|---|
| How to Get My Husband on My Side Manwha | How to Replace Roman Tub Faucet with No Access Panel |

III. Embroidery Techniques for Knitting
1. Running Stitch
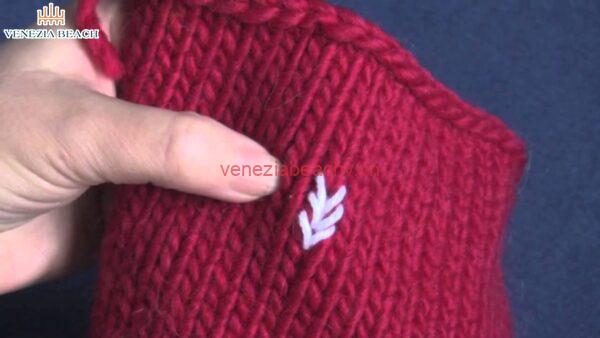
The running stitch is one of the most basic embroidery stitches for knitting. It involves making straight, even stitches across the fabric. To create a running stitch, bring the needle up through the knitting at the start point and then down through the fabric a short distance away. Continue stitching along the desired path, keeping the stitches consistent in length. This simple stitch is ideal for adding outlines or basic designs to your knitted projects.
2. Backstitch
The backstitch is a versatile and durable stitch that creates a solid line of embroidery. Start by bringing the needle up through the knitting at the starting point. Then, insert the needle a short distance ahead and bring it back through the fabric, creating a backward stitch. Continue stitching, bringing the needle back through the fabric at the end of each stitch. The backstitch is great for creating more intricate designs and adding details to your knitting.
3. Satin Stitch
The satin stitch is perfect for filling in larger areas with smooth, solid embroidery. To create a satin stitch, bring the needle up through the fabric at one edge of the area to be filled. Then, take the needle down through the fabric at the opposite edge of the area, creating a straight stitch. Continue stitching parallel stitches close together until the entire area is filled. The satin stitch adds texture and richness to your knitting, making it stand out.

IV. Conclusion
Embroidering onto knitting opens up a world of creative possibilities, allowing you to add personal touches and intricate designs to your knitted projects. With this comprehensive guide, you’ve learned the basics of embroidering onto knitting, including essential stitches, techniques, and tips for success. By preparing your knitting, selecting the right design, and following our step-by-step instructions, you’ll be able to create beautifully embellished pieces that showcase your unique style.
Throughout this article, we’ve explored the benefits of embroidering onto knitting, such as adding dimension and texture to your projects, creating personalized gifts, and exploring innovative design options. We’ve also provided inspiring examples to fuel your creativity and help you discover new possibilities. Whether you’re a beginner or an experienced crafter, embroidering onto knitting is a skill worth mastering.
Now armed with the knowledge and confidence gained from this guide, it’s time to pick up your knitting needles, select your favorite embroidery thread, and start transforming your knitting projects into works of art. Embrace the art of embroidering onto knitting and let your creativity flourish!